Rent server on
1. Prepare
First you need to install Rust and NodeJS, use the following commands (execute one-by-one):
Rust:
curl --proto '=https' --tlsv1.2 -sSf https://sh.rustup.rs | sh
source $HOME/.cargo/env
rustup target add wasm32-unknown-unknown
NodeJS:
sudo apt update
curl https://deb.nodesource.com/setup_16.x | sudo bash
sudo apt install -y nodejs gcc g++ make < "/dev/null"
curl -sL https://dl.yarnpkg.com/debian/pubkey.gpg | gpg --dearmor | sudo tee /usr/share/keyrings/yarnkey.gpg >/dev/null
echo "deb [signed-by=/usr/share/keyrings/yarnkey.gpg] https://dl.yarnpkg.com/debian stable main" | sudo tee /etc/apt/sources.list.d/yarn.list
sudo apt update && sudo apt install yarn
2. Install Near CLI
Install Near CLI by the following command:
npm install -g near-cliLet’s forward port 5000 to the local network from your server by running the command (you have to do this on the console of your PC, i.e. if you are running Windows open a terminal and type the command below):
ssh -L 5000:127.0.0.1:5000 -C -N -l USERNAME SERVER_IPWhere USERNAME is your user name (usually root), where SERVER_IP is the IP of the server where you install Flux.
Example:
ssh -L 5000:127.0.0.1:5000 -C -N -l root 228.666.777.007Enter yes, enter your password, press Enter. If you do not get any errors – everything ok.
3. Creating a wallet
Go to wallet site, create a wallet:
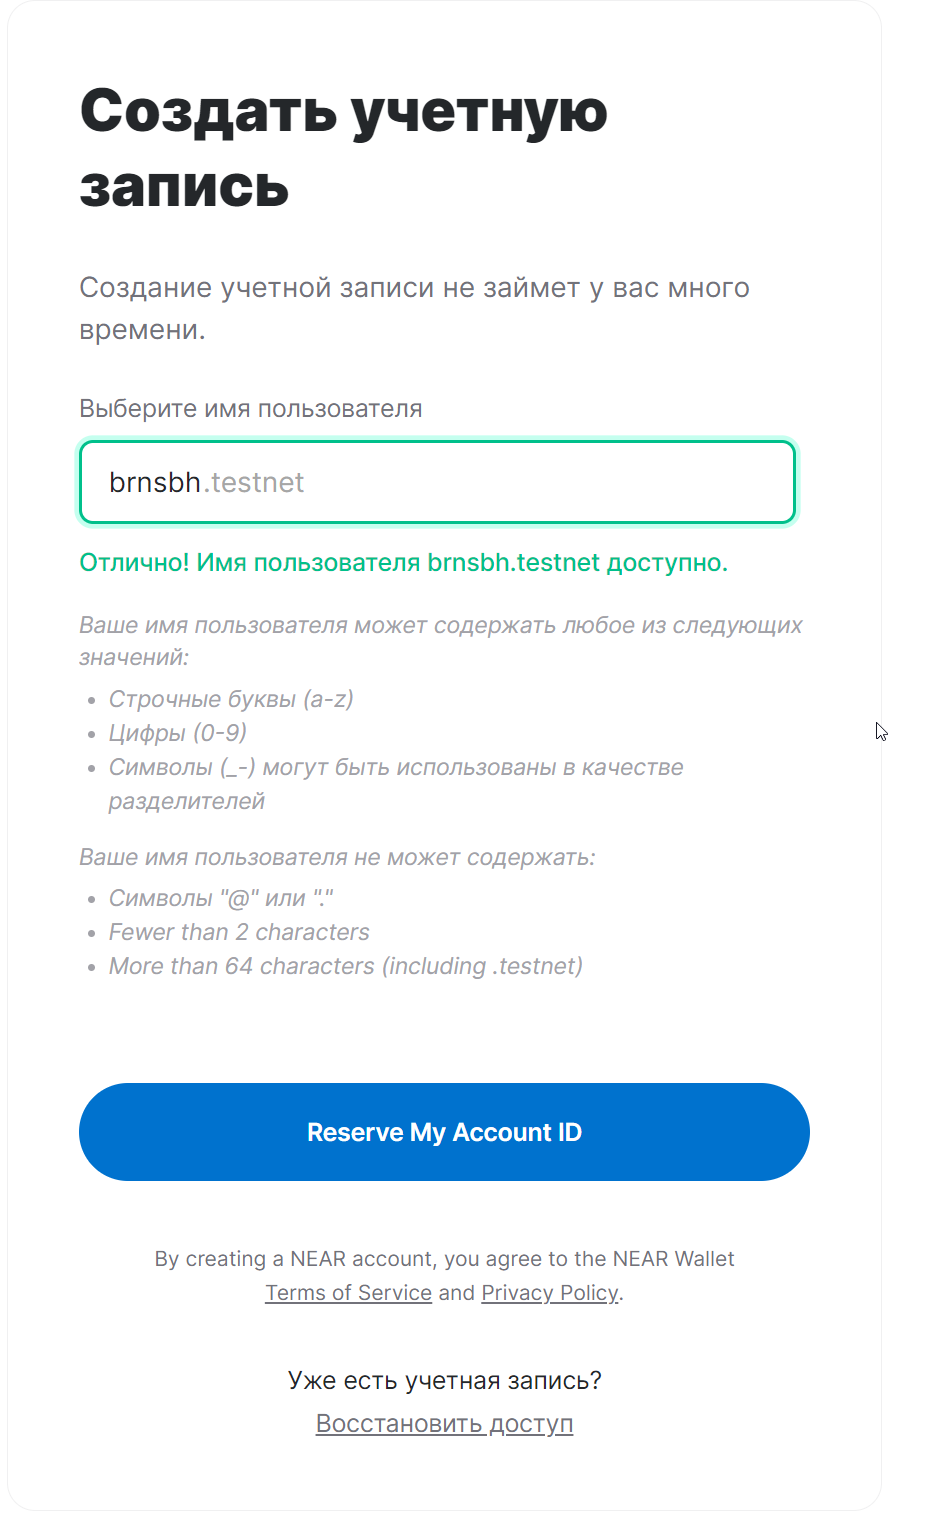
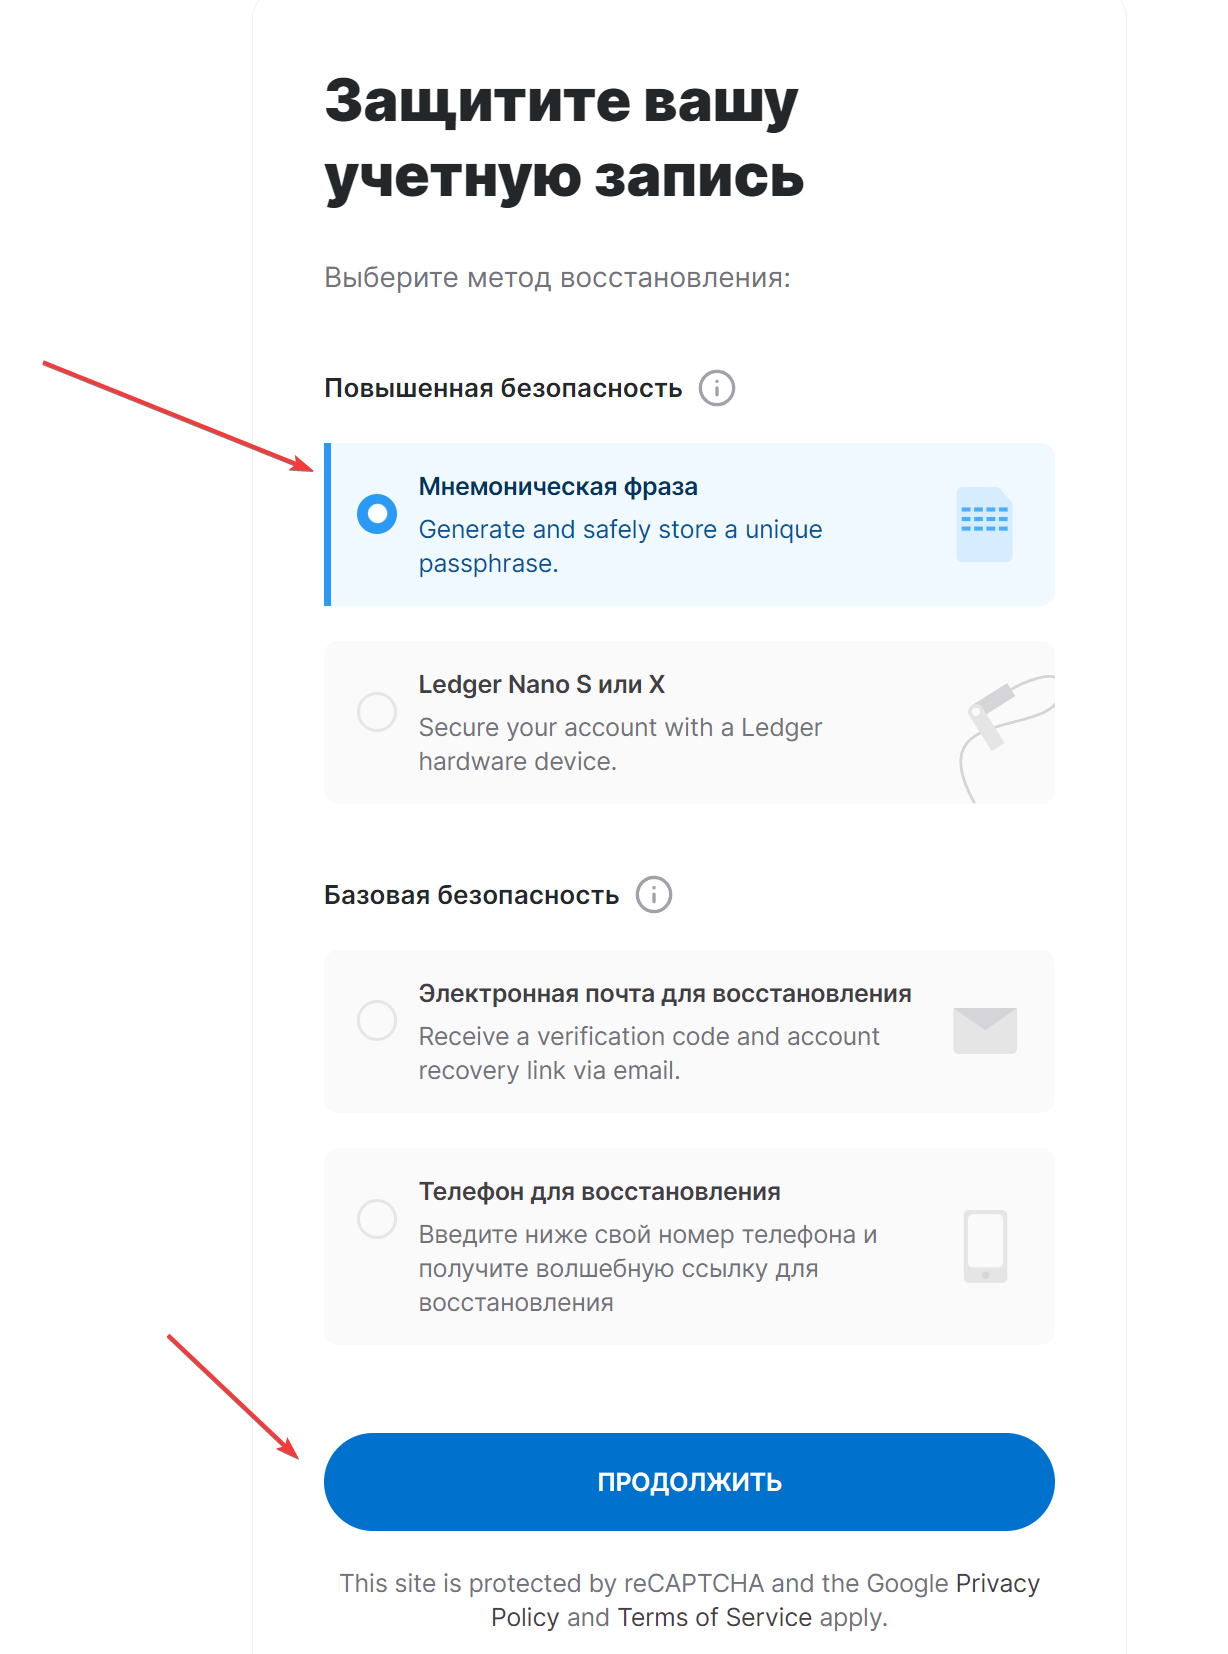
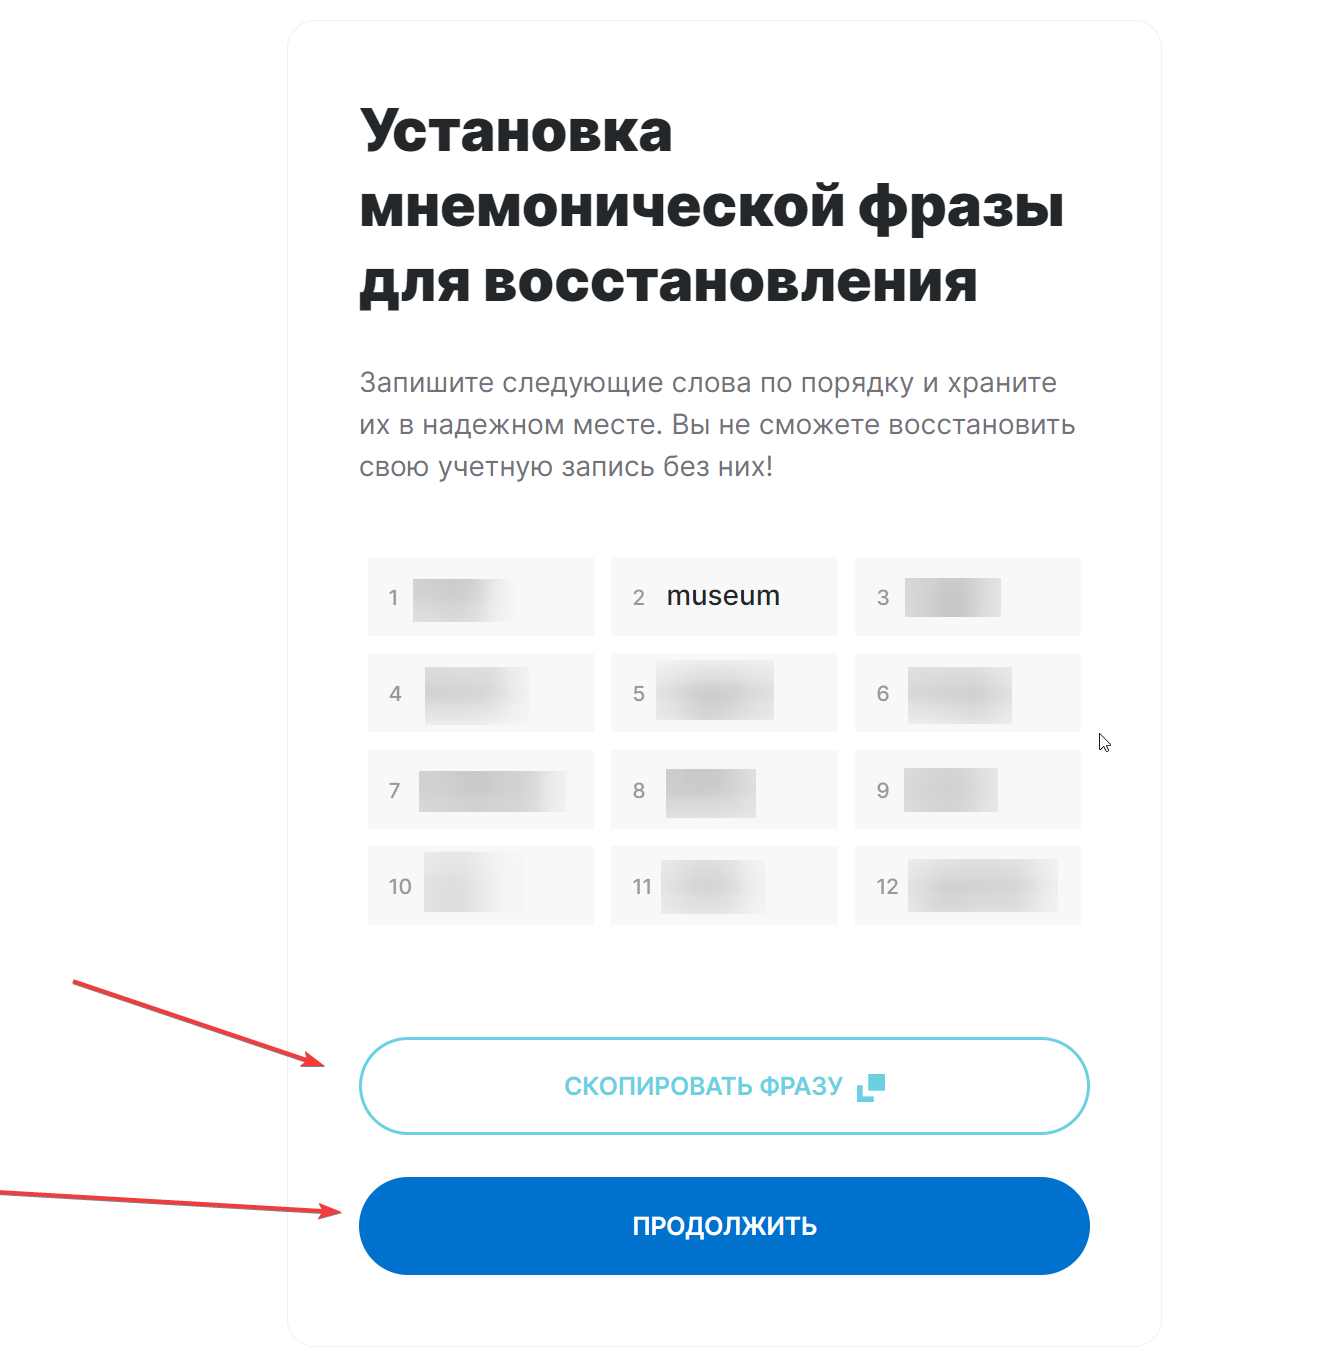
Don’t forget to keep the mnemonic!
4. Connecting a wallet
Go to Flux Explorer website, connect the wallet by clicking the Login button on the top right. After connecting, you should see the following:

This means that you have successfully connected the wallet.
Now enter the command on the server:
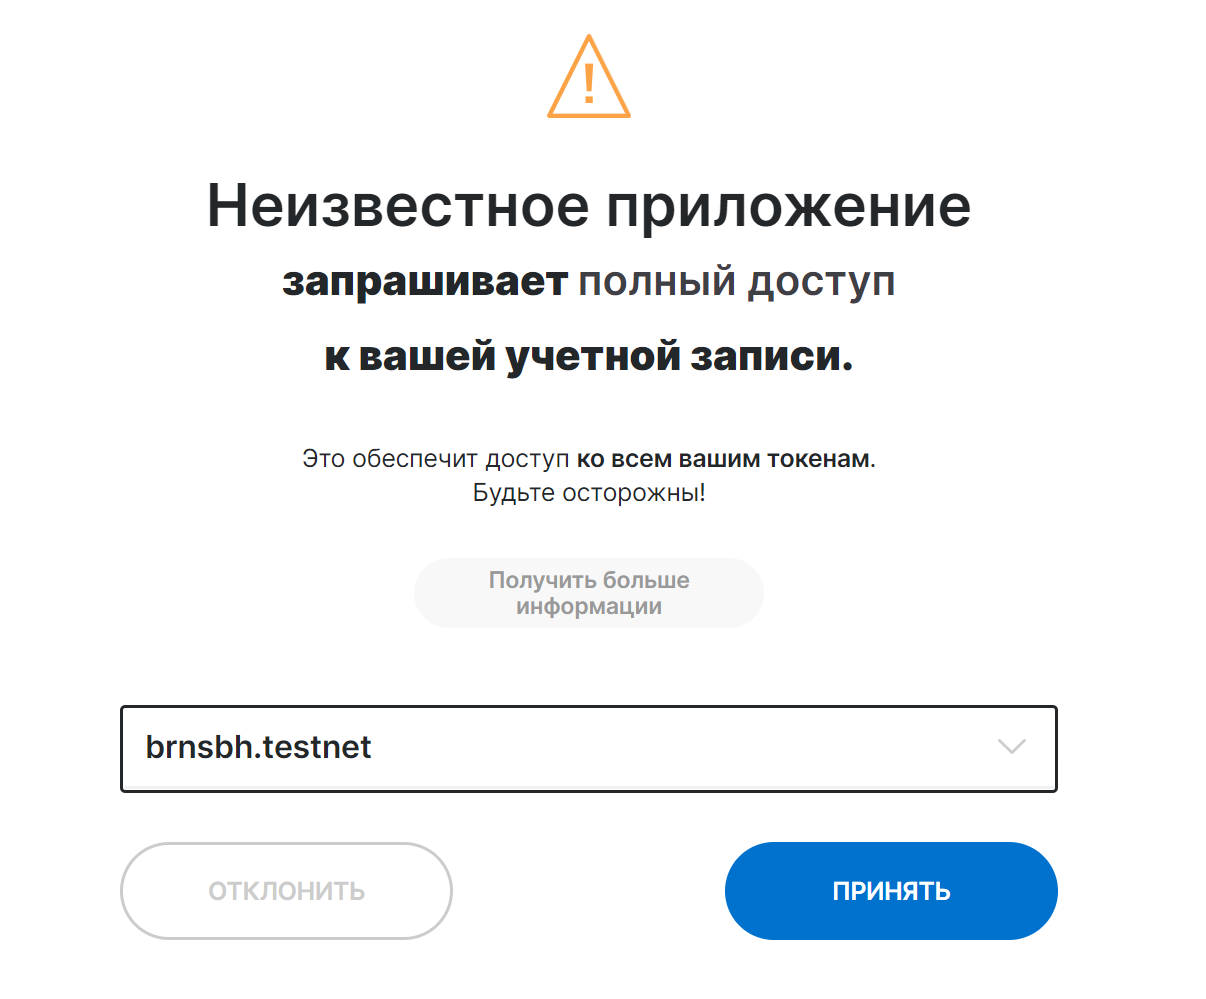
near loginType y, press Enter, then find the link and follow it:

Now connect your wallet in your browser:

As a result, you should see this window in your browser:
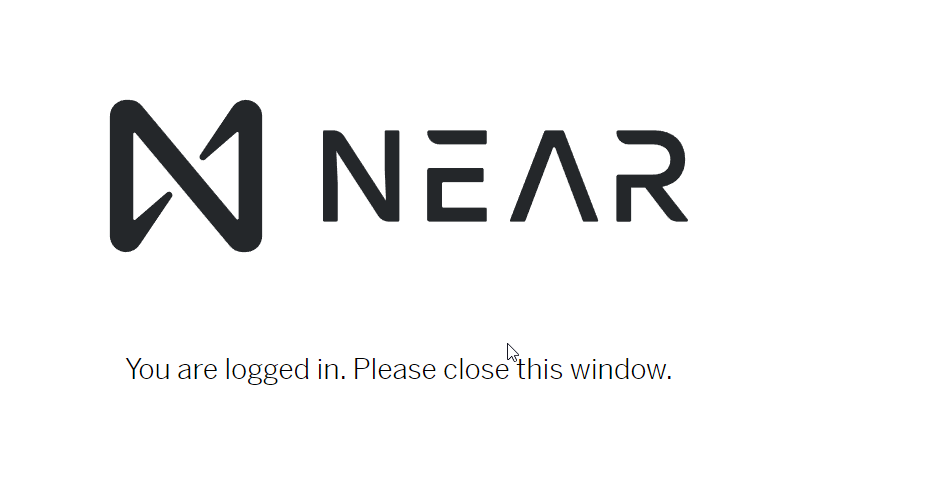
And in the console you should see an output:

5. Funding
In order to get tokens, enter the following commands (set the variable FLUX_ACCOUNT_ID with your Account ID, i.e. replace brnsbh.testnet with your value):
FLUX_ACCOUNT_ID=brnsbh.testnet
near call v2.wnear.flux-dev storage_deposit '{"account_id": "$FLUX_ACCOUNT_ID"}' --accountId $FLUX_ACCOUNT_ID --amount 0.00125 --gas=300000000000000
near call v2.wnear.flux-dev near_deposit "{}" --accountId $FLUX_ACCOUNT_ID --amount 20 --gas=300000000000000
The output should be something like this:

Check your wallet in explorer, the balance should be like this:

6. Install Flux
Execute the commands below (copy the entire command block below and paste it into the console):
cd $HOME
git clone https://github.com/fluxprotocol/oracle-validator-node.git
cd oracle-validator-node
git fetch --all
git checkout tags/v2.4.0
echo "# Core options
DEBUG = true
# HTTP server options
HTTP_PORT = 28484
# Database
DB_PATH = ./
DB_NAME = flux_db
# Providers
ACTIVATED_PROVIDERS = near
# NEAR options
NEAR_CREDENTIALS_STORE_PATH = $HOME/.near-credentials/
NEAR_ACCOUNT_ID = $FLUX_ACCOUNT_ID
NEAR_RPC = https://rpc.testnet.near.org
NEAR_CONTRACT_ID = 07.oracle.flux-dev
NEAR_NETWORK_ID = testnet
NEAR_MAX_STAKE_AMOUNT = 15" > $HOME/oracle-validator-node/.env
yarn install
After successfully loading the dependencies, create a service and start the Flux node:
echo "[Unit]
Description=Flux Validator Node
After=network-online.target
[Service]
User=$USER
ExecStart=$(which yarn) --cwd $HOME/oracle-validator-node start
Restart=always
RestartSec=10
LimitNOFILE=10000
[Install]
WantedBy=multi-user.target
" > $HOME/fluxd.service
sudo mv $HOME/fluxd.service /etc/systemd/system
sudo tee <<EOF >/dev/null /etc/systemd/journald.conf
Storage=persistent
EOF
sudo systemctl restart systemd-journald
sudo systemctl daemon-reload
sudo systemctl enable fluxd
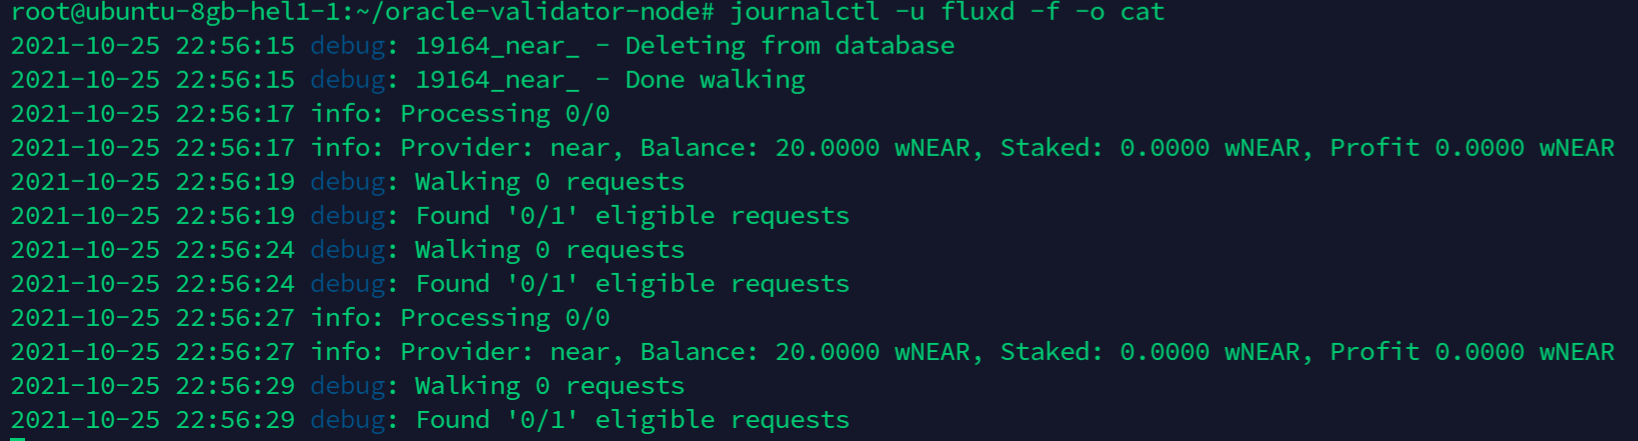
sudo systemctl restart fluxdCheck your node logs:
journalctl -u fluxd -fAfter a while output should be like this: